This entry the series takes place in Victorian London, which looks absolutely gorgeous in the game, to say the least. You have two main protagonists to choose from and also a few other interesting additions that will definitely make the fans of the series really happy. Read more about the game in this article.
In order to ease the walkthrough of the main story, we present you this guide on the first three sequences of the game, which helps you make the right decisions on your way to conquering the Industrial London of the 19th century. Let’s begin!
Sequence 1: A Spanner in the Works
During the introductory cutscene, we learn about further plans of Abstergo to find the rest of the Piece of Eden, technologically advanced devices. The focus then shifts to Jacob and Evie Frye, the two Assassins in 1868 London. The next cutscene sends us back into the Animus during the Industrial Revolution in London.
Henry Green, also known as The Ghost, and the leader of the Assassins in London, explains the situation regarding the Templars and their ruthless master Crawford Starrick. After the cutscene, we see him counseling the twins on the new target - Rupert Ferris, the owner of the Iron Works factory. And thus the first mission starts.
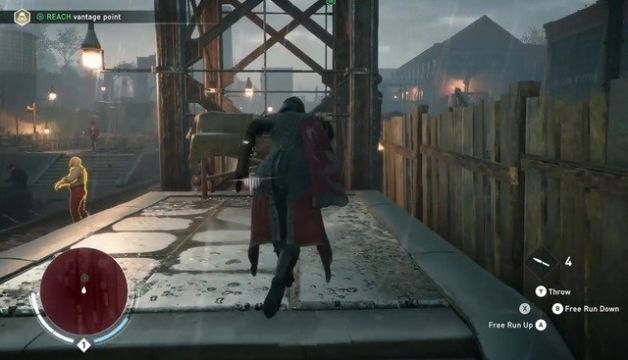
You begin your gameplay with Jacob in the factory, and your first task is to get to the exit, which is locked. Look at your mini map and head towards two valves you need to turn in order to sabotage the machines. This will make two thugs open the exit door.
After you deal with this, find your way to the marked location, where Rupert Ferris is hiding. Get there and assassinate the cruel industrialist. When the job is done, you will have to get yourself out by jumping on the moving train outside.
During your escape, you will be followed by a bunch of thugs, so use your throwing knives to quickly get rid of them all. Sequence 1 ends with a nice little cutscene.
Other Sequence 1 tips and tricks:
Try to be stealthy in order to earn more bonus points. Use Eagle Vision to detect all the enemies.
Sequence 2: A Simple Plan
This time it’s Evie’s turn to show her abilities. Her target is Sir David Brewster, a Scottish Templar and a scientist. After a short cutscene introducing the target, Evie begins her quest on a train. She needs to move forward to the engine car and kill every soldier she encounters on her way.
Your next location is the Yard. Here, you need to accomplish a side mission before getting to the main one: all you have to do is drop barrels on the guard. Then, you can progress further and locate David Brewster in his Laboratory. The game will indicate that you must first speak to an unknown captive in order to learn more about the laboratory’s location.
After the conversation with the captive, you learn about the key that opens the door to the underground facility. Kill the guards and obtain the key. Move along to enter the laboratory and find Brewster experimenting with the Piece of Eden. Assassinate the scientist and quickly make your way out of the collapsing lab.
Other Sequence 2 tips and tricks:
This sequence is a good opportunity to try all of Evie’s skills. Use your earned skill points to upgrade your Eagle Vision.
Sequence 3, Part 1: Somewhere That’s Green
The cutscene in the beginning of this sequence shows the Frye twins deciding to jump the train to head towards London immediately. There’s another present-day cutscene that takes place in the Abstergo offices. Then, the actual mission starts in London.
From the get-go, Jacob is pickpocketed by a kid and he needs to chase him. After the chase, meet Evie and Henry Green on the roof, and another cutscene follows. Later, move upwards to the vantage point and perform the Leap of Faith.
One more cutscene involves famous writer Charles Dickens and a new task from Henry Green. You need to take his carriage back to his shop, and this is where you get to try the new game mechanics.
Sequence 3, Part 2: To Catch An Urchin
As you reach the shop, Henry Green gives you four more missions to accomplish. The events of the missions take place in Whitechapel – one of London’s seven boroughs. Also, this time you can choose between Jacob and Evie.
Mission 1 - Gang Stronghold
Here you simply need to beat a few blighters – thus sending a message to Rexford Keylock, the gang leader. If you want to earn some more points, you can accomplish other side objectives, as well.
Mission 2 - Templar Hunt
Your target is Harold Drake, a Templar. You can assassinate him the way you want, but it is recommended that you shoot the crate with dynamite behind him, which will earn you some bonus points.
Mission 3 - Bounty Hunt
Watch a funny cutscene involving Abberline, a policeman disguised as an old lady, who tasks you with capturing a thug. Locate the target on your map and chase him. Then, quickly deliver him to the marked location.
Mission 4 - Child Liberation
Another cutscene introduces a girl named Clara, who asks you to free a bunch of kids from their labor. This is an easy task; all you have to do is beat up a few thugs and avoid triggering the alarm.
After you successfully finish all four missions, you get to meet Henry Green, who shares some nice weapons with you. Also, you get to encounter Rexford Keylock, the Blighters’ leader, who sends 10 thugs after you – but promises that if you manage to beat them all he will put his own personal train in your hands. Not a bad deal!
By obtaining the train, you will get the chance to recruit your own gang members – the Rooks. You also get the access to the Gang Upgrades menu.
Sequence 3, Part 3: Freedom of the Press
This last part of Sequence 3 takes you to Lambeth, another borough of London, and you get to meet Alexander Graham Bell, scientist, inventor, and engineer. He helps Evie attach a Rope Launcher in a cutscene, and Evie volunteers to help him get his telegraph project off the ground.
The mission requires you to install three fuses, where you get to use your newly acquired Rope Launcher. As you do this, the game offers a few side quests to accomplish, and then you can go back to Mr. Bell’s shop to finish the sequence.
Other Sequence 3 tips and tricks:
Try to accomplish as many side quests as possible. Use your earned skill points to upgrade necessary skills.
Come back soon for more awesome Assassin’s Creed: Syndicate guides at Gameskinny!